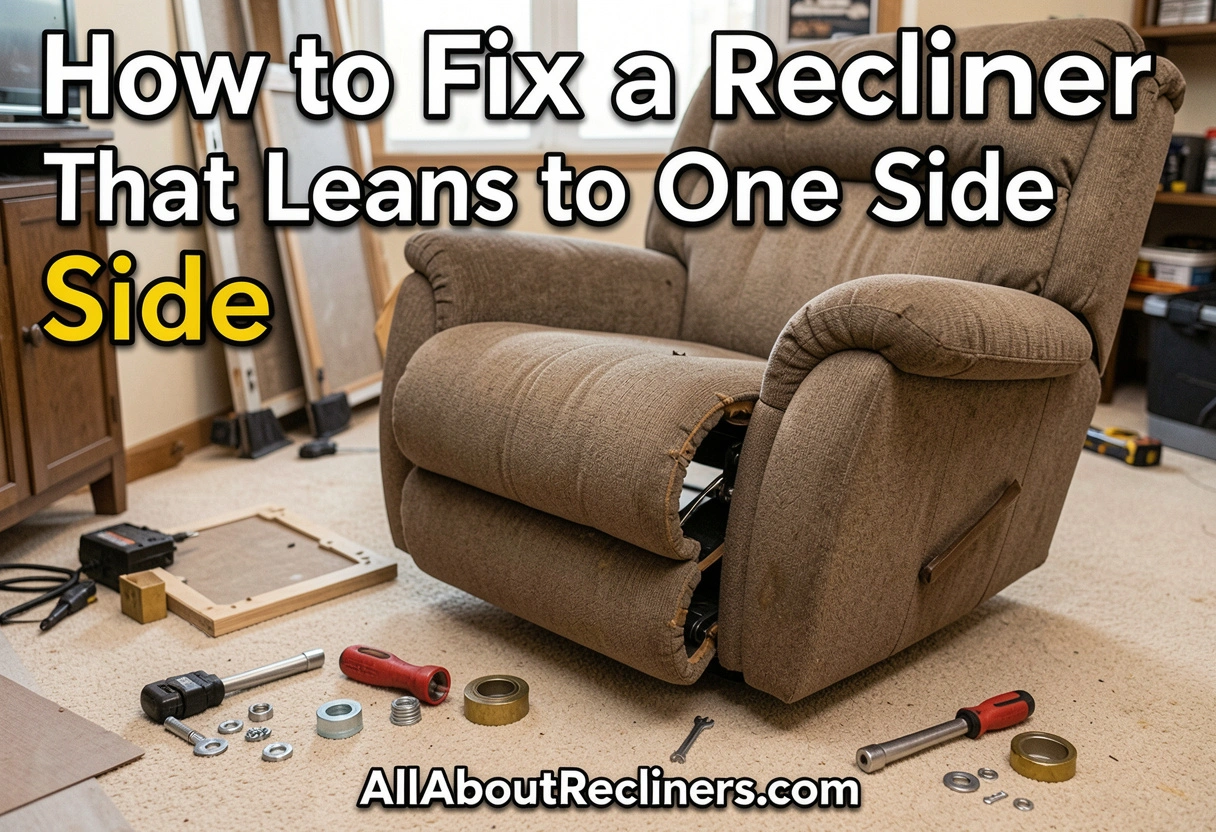
How to Fix a Recliner That Leans to One Side: 7 Proven Solutions That Work
Key Takeaways
- A recliner that leans to one side is usually caused by loose hardware, a damaged frame, worn springs, uneven cushioning, or flooring issues.
- Many leaning recliners can be fixed with basic tools and simple DIY repairs.
- Always inspect the recliner carefully before replacing parts.
- Tightening bolts and checking the base are often the quickest fixes.
- Power recliners may require additional troubleshooting involving motors and mechanisms.
- Regular maintenance can prevent most leaning issues from returning.
How Do You Fix a Recliner That Leans to One Side?
To fix a recliner that leans to one side, inspect the chair for loose bolts, damaged springs, bent frame components, uneven cushions, or an unstable base. Tighten any loose hardware, replace worn parts, and check that the recliner sits on a level surface. In many cases, the problem can be solved without replacing the entire chair.
Introduction: How to Fix a Recliner That Leans to One Side Without Replacing It
I still remember the first recliner I ever tried to repair.
It belonged to my uncle.
The chair looked perfectly fine from across the room.
But the moment I sat down, it felt like I was slowly sliding off the side of a small hill.
His description was simple:
“Something’s wrong with it.”
Very helpful.
After turning the recliner upside down and spending about twenty minutes investigating, I found the culprit.
A few loose bolts had worked themselves free over years of use.
Ten minutes later, the chair felt brand new.
That experience taught me an important lesson:
A recliner leaning to one side doesn’t automatically mean it’s ruined.
In fact, many leaning recliners can be repaired with basic tools and a little patience.
If your favorite recliner suddenly feels uneven, don’t panic.
This guide will walk you through the most common causes and fixes so you can get back to enjoying your chair without feeling like you’re sitting on a tilted carnival ride.
Understanding How a Recliner Works
Before troubleshooting a leaning recliner, it helps to understand what’s happening underneath the upholstery.
Many homeowners never see the hidden components that make a recliner comfortable and stable.
The Main Components of a Recliner
Most recliners contain several key parts.
Frame
The frame provides structural support.
Depending on the model, it may be made from:
- Hardwood
- Engineered wood
- Steel
- Mixed materials
Reclining Mechanism
This system allows the chair to move between upright and reclined positions.
Springs and Support System
These components help distribute weight evenly.
Base and Legs
The base keeps the recliner stable on the floor.
Cushions and Padding
These provide comfort while helping maintain proper seating balance.
When one of these systems fails, leaning can occur.
Why Balance Matters
A recliner is designed to distribute weight evenly.
When that balance is disrupted, you may notice:
- Tilting
- Leaning
- Rocking
- Uneven seating
Even minor issues can become uncomfortable over time.
Signs Your Recliner Has a Structural Problem
Watch for:
- One arm sitting lower than the other
- Uneven seat cushions
- Visible frame distortion
- Difficulty reclining smoothly
- Unusual noises when sitting
These clues help identify the source of the problem.
What Causes a Recliner to Lean to One Side?
Understanding the cause is the first step toward finding the right solution.
Let’s look at the most common reasons.
Loose or Missing Bolts and Screws
This is one of the easiest problems to fix.
Over years of use:
- Vibrations
- Movement
- Weight shifts
can loosen fasteners.
Symptoms
- Sudden leaning
- Slight wobbling
- Frame movement
Fortunately, tightening hardware often resolves the issue quickly.
Uneven Wear and Tear
Recliners rarely wear evenly.
Most people have a favorite side.
And yes, recliners notice.
Over time:
- Springs weaken
- Cushions compress
- Supports wear unevenly
This can create a noticeable lean.
Damaged Recliner Frame
Frames endure tremendous stress.
Especially in homes where recliners see daily use.
Common Causes
- Heavy impacts
- Excessive weight
- Age-related wear
A damaged frame can affect stability significantly.
Broken or Weak Springs
Springs help support your weight.
When one weakens or breaks, balance suffers.
Warning Signs
- Sinking sensation
- Uneven support
- Leaning while seated
We’ll cover spring repairs later in the guide.
Worn-Out Cushioning
Sometimes the chair isn’t actually leaning.
The cushion is.
Compressed foam can create the feeling of sitting lower on one side.
This is especially common in older recliners.
Uneven Flooring
Believe it or not, the chair may not be the problem.
I’ve seen homeowners spend hours inspecting recliners only to discover the floor was slightly uneven.
Always check the simplest explanation first.
Manufacturing Defects
While uncommon, defects occasionally occur.
These typically become noticeable early in the recliner’s life.
If your recliner is relatively new, warranty coverage may help.
Tools and Supplies You’ll Need
One thing I appreciate about recliner repairs is that most don’t require specialized equipment.
Many homeowners already own the necessary tools.
Basic Tools for Most Repairs
Keep these nearby before starting.
Screwdrivers
Both:
- Flathead
- Phillips
may be needed.
Adjustable Wrench
Useful for tightening bolts and nuts.
Socket Set
Helpful for accessing recliner hardware.
Flashlight
Essential for inspecting hidden components.
Measuring Tape
Useful when checking alignment issues.
Helpful Optional Tools
These aren’t always necessary but can make repairs easier.
Work Gloves
Protect your hands from sharp edges.
Lubricant Spray
Useful for moving components.
Furniture Shims
Helpful when diagnosing floor-related issues.
Inspection Mirror
Makes it easier to see underneath the chair.
Replacement Parts You May Need
Depending on the problem, replacements may include:
- Bolts
- Screws
- Springs
- Cushion inserts
- Recliner mechanism parts
Don’t purchase parts until you’ve identified the actual issue.
Safety Precautions Before Repairing Your Recliner
I’ve learned this lesson the hard way.
A few minutes of preparation can prevent a lot of frustration.
And occasionally, a trip to the first-aid kit.
Disconnect Power Recliners
If your recliner has:
- Power controls
- USB ports
- Electric motors
unplug it before beginning repairs.
Safety first.
Create a Safe Work Area
Choose a space with:
- Good lighting
- Adequate room
- Stable flooring
Avoid crowded areas where tools can become hazards.
Turn the Recliner Carefully
Most inspections require access underneath the chair.
Get help if necessary.
Recliners can be heavier than they look.
Especially power models.
Wear Proper Protection
Consider:
- Gloves
- Safety glasses
particularly when working near springs or metal components.
Take Photos Before Disassembly
This simple tip has saved me countless headaches.
Before removing anything:
Take pictures.
Future you will appreciate it.
Know When to Stop
Some repairs are straightforward.
Others involve:
- Structural welding
- Major frame replacement
- Electrical diagnostics
If a repair exceeds your comfort level, professional assistance may be the better option.
Quick Diagnostic Checklist
Before grabbing tools, answer these questions.
| Question | Possible Cause |
|---|---|
| Does the chair wobble? | Loose hardware |
| Does one side sink? | Cushion or spring issue |
| Is the frame visibly bent? | Structural damage |
| Does the lean disappear on another floor? | Flooring issue |
| Does the chair make noises? | Mechanism or hardware issue |
This quick assessment often narrows down the problem immediately.
The Most Common Recliner Repair Myth
Here’s a myth I hear frequently:
“If a recliner leans, it’s time to buy a new one.”
Not necessarily.
Many leaning recliners suffer from surprisingly simple issues such as:
- Loose bolts
- Worn cushions
- Minor spring problems
Always inspect before replacing.
A ten-minute repair may save hundreds of dollars.
Inspecting the Recliner and Fixing Common Structural Problems
Now that we’ve covered the basics, it’s time to get our hands dirty.
Well, hopefully not too dirty.
Most recliner repairs don’t involve grease-covered engines or complicated electronics. In many cases, you’re simply identifying a loose, worn, or damaged part and restoring proper balance.
The goal here is simple:
Find the root cause before spending money on replacement parts.
I’ve seen homeowners replace cushions, springs, and even entire recliner mechanisms only to discover a loose bolt was causing the problem all along.
Let’s avoid that mistake.
How to Inspect a Recliner That Leans to One Side
Before fixing anything, you need a proper diagnosis.
Think of yourself as a recliner detective.
Step 1: Place the Recliner on a Flat Surface
This is extremely important.
If the floor isn’t level, your diagnosis may be completely wrong.
Good Test Locations
- Garage floor
- Tile floor
- Hardwood floor
- Concrete surface
Avoid thick carpet whenever possible.
Step 2: Sit in the Recliner
Pay attention to:
- Which side leans
- How much it leans
- Whether the lean changes while reclining
These observations provide valuable clues.
Ask Yourself
- Does it lean immediately?
- Does it lean only when reclined?
- Does it wobble when moving?
Each answer points toward a different problem.
Step 3: Inspect the Chair From All Angles
Look for:
- Uneven arms
- Crooked seat cushions
- Bent frame sections
- Damaged feet
Sometimes the problem is surprisingly obvious.
Step 4: Turn the Recliner Over
This is where most problems reveal themselves.
Use a flashlight and inspect:
- Frame joints
- Springs
- Hardware
- Reclining mechanism
- Support brackets
Take your time.
Rushing often leads to missed problems.
Step 5: Check Every Connection Point
Focus on:
- Nuts
- Bolts
- Screws
- Brackets
Loose connections are among the most common causes of leaning.
Fixing Loose Bolts, Nuts, and Fasteners
If I had to guess the cause of a leaning recliner without seeing it, loose hardware would be my first guess.
It’s that common.
Why Hardware Loosens Over Time
Every time you:
- Sit down
- Stand up
- Recline
- Shift your weight
the chair experiences stress.
Years of movement gradually loosen fasteners.
How to Check for Loose Hardware
With the recliner upside down:
Inspect All Bolts
Look for:
- Missing bolts
- Partially backed-out bolts
- Loose brackets
Wiggle Components Gently
Movement often reveals loose connections.
Compare Both Sides
The stable side often provides a useful reference.
Tightening Hardware Correctly
Use:
- Socket wrench
- Adjustable wrench
- Screwdriver
depending on the fastener type.
Important Tip
Tighten firmly.
But don’t overtighten.
Excessive force can:
- Strip threads
- Damage components
- Create new problems
Replacing Missing Fasteners
Occasionally you’ll discover missing hardware.
Replace it with:
- Matching size
- Matching length
- Matching strength rating
If possible, consult the manufacturer’s parts information.
Repairing an Uneven Recliner Base
The base acts as the foundation of the chair.
If it’s damaged, leaning is almost inevitable.
Signs of Base Problems
Common symptoms include:
- Rocking
- Side-to-side movement
- Uneven contact with the floor
Inspecting Recliner Feet
Some recliners use:
- Plastic glides
- Rubber feet
- Wooden supports
Look for:
- Cracks
- Missing pieces
- Uneven wear
Testing the Base
Place the recliner on a level surface.
Then check whether all feet touch the floor evenly.
Simple Test
Slide a piece of paper beneath each foot.
If one foot doesn’t contact the floor properly, you’ve found a potential issue.
Replacing Damaged Feet
Many replacement feet are inexpensive.
Installation is often straightforward.
A damaged foot can easily create the impression of a much larger problem.
Using Furniture Shims
If the floor itself is uneven:
Furniture shims may solve the issue immediately.
This is often the simplest fix available.
How to Fix a Bent Recliner Frame
Frame damage sounds scary.
And sometimes it is.
But minor frame issues aren’t always a death sentence for the recliner.
Signs of a Bent Frame
Look for:
- Twisted metal components
- Uneven arm height
- Visible warping
- Misaligned supports
Common Areas of Damage
- Front crossbars
- Side supports
- Seat frame sections
These areas experience significant stress.
Metal Frame Inspection
Many modern recliners use steel frames.
Check for:
- Bends
- Cracks
- Weld failures
Even small distortions can affect balance.
Wooden Frame Inspection
Wooden frames may develop:
- Splits
- Cracks
- Loose joints
These problems often worsen over time if ignored.
Minor Frame Repairs
Some minor issues can be corrected through:
Reinforcement
Adding brackets or supports.
Tightening Connections
Loose frame joints can mimic structural damage.
Replacing Small Components
Sometimes only one damaged support needs replacement.
When Frame Damage Is Serious
Certain problems usually require professional repair.
Examples include:
- Broken welds
- Major frame warping
- Structural fractures
At this point, compare repair costs against replacement costs.
Common Inspection Findings and Recommended Fixes
| Problem Found | Recommended Action |
|---|---|
| Loose bolt | Tighten or replace |
| Missing fastener | Replace with matching hardware |
| Uneven foot | Replace foot or shim floor |
| Loose bracket | Tighten mounting hardware |
| Bent support bar | Repair or replace |
| Cracked wooden frame | Reinforce or repair |
| Broken weld | Professional repair |
A Real-World Example
A few years ago, I helped a neighbor inspect a recliner that leaned dramatically to the right.
He was convinced the frame was broken.
After flipping the chair over, we found:
- Two loose bolts
- One missing washer
That was it.
The repair cost less than five dollars.
The entire process took about fifteen minutes.
The lesson?
Never assume the worst.
Start with the simplest possibilities.
How Long Should These Repairs Take?
Here’s a rough estimate.
| Repair Type | Typical Time |
|---|---|
| Tightening hardware | 10–20 minutes |
| Base inspection | 15–30 minutes |
| Replacing feet | 15–30 minutes |
| Frame inspection | 20–45 minutes |
| Minor frame repair | 30–90 minutes |
Most homeowners can complete these tasks in an afternoon.
Fixing Springs, Cushions, Reclining Mechanisms, and Power Recliners
If you’ve already checked the frame, base, and hardware but your recliner still leans to one side, don’t worry.
We’re moving into the next group of likely suspects.
In my experience, many recliners that appear structurally sound still develop leaning problems because of what happens inside the chair.
Specifically:
- Springs wear out
- Cushions compress
- Mechanisms loosen
- Motors become misaligned
The good news?
Many of these problems are easier to diagnose than people expect.
Fixing Damaged Recliner Springs
Springs are one of the most important support systems in any recliner.
They help distribute your weight evenly.
When a spring fails, the chair often starts leaning.
How Springs Affect Recliner Balance
Think of springs as the suspension system of your recliner.
If one side loses support, that side sinks.
And when one side sinks, the chair feels uneven.
Common Signs of Spring Problems
Watch for symptoms such as:
- One side sitting lower
- Sinking sensation
- Uneven comfort
- Metallic noises
- Reduced support
These clues often point directly to a spring issue.
Types of Springs Found in Recliners
Most recliners use one or more of the following:
Coil Springs
Traditional support springs.
Sinuous Springs
Zigzag-shaped metal supports.
Tension Springs
Often connected to reclining mechanisms.
Each type can wear out over time.
Inspecting Recliner Springs
Turn the recliner over and examine:
- Broken springs
- Loose attachments
- Bent sections
- Rust damage
Compare both sides carefully.
A damaged spring often stands out once you know what to look for.
Reattaching Loose Springs
Sometimes the spring itself isn’t broken.
It has simply detached.
If so:
- Inspect the attachment point.
- Replace damaged clips if necessary.
- Reattach the spring securely.
Always wear gloves when working with springs.
They’re under tension and can snap unexpectedly.
Replacing Broken Springs
If a spring is damaged:
- Measure the original spring.
- Purchase a matching replacement.
- Follow manufacturer guidelines whenever possible.
Using the wrong spring can create new balance problems.
Repairing Worn-Out Recliner Cushions
Here’s something many homeowners overlook.
Sometimes the recliner isn’t leaning.
You’re sinking.
The result feels exactly the same.
How Cushions Create Leaning
Foam compresses over time.
And it rarely compresses evenly.
Especially if:
- One person uses the chair most often
- The recliner is several years old
- Lower-density foam was used
Signs of Cushion Compression
Look for:
- Uneven seat height
- Flattened foam
- Reduced support
- Visible indentation
If the cushion is noticeably lower on one side, you’ve likely found part of the problem.
How to Check Cushion Support
Sit in the recliner.
Then:
- Shift your weight side to side.
- Compare support levels.
- Observe cushion recovery.
A healthy cushion rebounds relatively quickly.
Temporary Cushion Solutions
For mild compression:
Foam Inserts
Additional support foam may help.
Cushion Boards
Support boards can reduce sagging temporarily.
Extra Padding
Can improve comfort while you plan a permanent repair.
Replacing Recliner Foam
For severe compression:
Replacing the foam is often the best solution.
Benefits include:
- Improved comfort
- Better support
- Restored balance
It’s one of the most effective upgrades for older recliners.
How to Fix Recliner Mechanism Problems
The reclining mechanism is one of the most complex parts of the chair.
And one of the most overlooked.
Understanding the Reclining Mechanism
The mechanism controls:
- Movement
- Weight distribution
- Positioning
When parts wear unevenly, leaning may occur.
Signs of Mechanism Problems
Common symptoms include:
- Leaning only while reclined
- Uneven movement
- Clicking sounds
- Resistance when reclining
These often indicate mechanical issues.
Inspecting the Mechanism
Turn the recliner over and check:
- Pivot points
- Linkages
- Mounting brackets
- Support arms
Look for:
- Bent parts
- Loose connections
- Excessive wear
Tightening Mechanism Hardware
Many mechanism problems begin with loose hardware.
Carefully inspect:
- Bolts
- Screws
- Brackets
Tightening these connections often improves stability.
Lubricating Moving Parts
A dry mechanism may not operate smoothly.
Use an appropriate lubricant on:
- Pivot joints
- Moving arms
- Connection points
Avoid excessive lubrication.
A little usually goes a long way.
Replacing Worn Mechanism Components
If parts are damaged:
Replacement may be necessary.
Commonly replaced components include:
- Brackets
- Pivot arms
- Linkages
- Tension components
Always verify compatibility before ordering parts.
Fixing Electric Recliners That Lean to One Side
Power recliners introduce additional variables.
Along with mechanical components, they rely on electrical systems.
Why Power Recliners Lean
Potential causes include:
- Motor alignment issues
- Uneven mechanism wear
- Electrical malfunctions
- Damaged actuators
The symptoms often resemble those of manual recliners.
Checking Motor Alignment
Inspect:
- Motor mounting brackets
- Connection points
- Movement synchronization
A loose motor mount can affect positioning.
Inspecting Electrical Components
Look for:
- Loose wires
- Damaged connectors
- Obvious wear
Always disconnect power before inspection.
Testing the Reclining Motion
Operate the chair through its full range.
Observe:
- Speed differences
- Uneven movement
- Jerking motions
These clues may indicate motor-related problems.
When to Contact the Manufacturer
Power recliners can become complicated quickly.
Professional assistance may be appropriate if:
- Motors fail
- Electronics malfunction
- Control systems stop responding
Sometimes warranty coverage can save significant money.
Common Recliner Problems and Their Likely Causes
| Symptom | Likely Cause |
|---|---|
| One side sinks | Cushion or spring issue |
| Lean appears only when reclined | Mechanism problem |
| Chair feels uneven on all surfaces | Frame or spring damage |
| Lean changes with user weight | Cushion compression |
| Chair tilts after reclining | Mechanism misalignment |
| Power recliner stops evenly moving | Motor or actuator issue |
The Most Overlooked Cause of Recliner Leaning
If I had to pick one commonly missed problem, it would be cushion compression.
Why?
Because people naturally assume the issue must be mechanical.
Meanwhile, years of sitting in the same spot have quietly flattened the foam underneath them.
Always inspect cushions carefully.
They’re often part of the story.
Should You Repair or Replace Parts?
As a general rule:
Repair When
- Components are loose
- Damage is minor
- Parts are available
Replace When
- Parts are broken
- Wear is severe
- Safety is compromised
Making the correct decision early saves both time and money.
Uneven Floors, Repair Costs, Professional Help, and Preventing Future Problems
At this point, we’ve covered most of the mechanical and structural reasons a recliner might lean to one side.
But before you order replacement parts or start dismantling your favorite chair, there’s one more possibility worth considering.
And believe it or not, it may have absolutely nothing to do with the recliner itself.
I’ve seen homeowners spend hours troubleshooting a perfectly good recliner only to discover the real problem was the floor underneath it.
Let’s start there.
How Uneven Floors Can Make a Recliner Lean
This is one of the simplest causes to diagnose—and one of the easiest to overlook.
Why Flooring Matters
A recliner is only as stable as the surface beneath it.
Even a small floor irregularity can create:
- Leaning
- Wobbling
- Uneven weight distribution
The larger and heavier the recliner, the more noticeable the problem becomes.
Signs the Floor May Be the Problem
Watch for these clues:
- The recliner feels stable in another room.
- The lean changes depending on placement.
- Multiple pieces of furniture wobble in the same area.
If any of these sound familiar, investigate the floor before repairing the chair.
Testing Your Recliner on Different Surfaces
One of the easiest diagnostic methods is relocation.
Move the recliner to:
- A garage floor
- Tile flooring
- Hardwood flooring
- Another room
If the lean disappears, you’ve likely identified the cause.
Using Furniture Shims
Furniture shims are inexpensive and surprisingly effective.
Benefits
- Quick installation
- Affordable solution
- No chair modifications required
Simply place the shim beneath the low side until the recliner sits level.
Long-Term Flooring Solutions
If uneven flooring affects multiple pieces of furniture, consider:
- Floor leveling
- Subfloor repairs
- Professional flooring evaluation
While these solutions cost more, they address the root problem.
DIY Repairs vs Professional Repairs
One question homeowners often ask is:
“Can I fix this myself?”
The answer depends on the cause.
Fortunately, many recliner repairs are DIY-friendly.
Repairs Most Homeowners Can Handle
These jobs typically require basic tools and patience.
Common DIY Repairs
- Tightening bolts
- Replacing screws
- Installing new feet
- Replacing cushions
- Lubricating mechanisms
- Reattaching springs
These projects are often completed within a few hours.
Repairs That May Require Professional Help
Some repairs become more complicated.
Examples include:
Structural Welding
Metal frame repairs often require specialized equipment.
Major Mechanism Replacement
Complex reclining systems can be difficult to align properly.
Electrical Troubleshooting
Power recliners introduce motors, switches, and wiring.
Severe Frame Damage
Safety becomes a concern when structural integrity is compromised.
Questions to Ask Yourself
Before attempting a repair, consider:
- Do I have the necessary tools?
- Am I comfortable performing this repair?
- Would a mistake create a safety issue?
- Is the recliner worth repairing?
Answering these questions honestly can save frustration later.
How Much Does It Cost to Fix a Recliner That Leans to One Side?
Repair costs vary significantly depending on the problem.
The good news?
Many fixes are surprisingly affordable.
Typical DIY Repair Costs
| Repair Type | Estimated Cost |
|---|---|
| Tightening Hardware | $0–$10 |
| Replacement Bolts | $5–$20 |
| Furniture Shims | $5–$15 |
| Spring Replacement | $15–$75 |
| Cushion Repair | $20–$150 |
| Lubrication Products | $5–$15 |
Simple repairs often cost less than a dinner out.
Professional Repair Costs
Professional services generally cost more but may be worthwhile for complex issues.
| Repair Type | Estimated Cost |
|---|---|
| Inspection Visit | $50–$150 |
| Spring Repair | $75–$250 |
| Mechanism Repair | $100–$400 |
| Frame Repair | $150–$500+ |
| Electrical Repair | $100–$500+ |
Prices vary based on:
- Location
- Chair model
- Labor rates
- Part availability
Cost Comparison: Repair vs Replacement
Sometimes replacement is the better financial decision.
A simple comparison helps.
| Situation | Better Option |
|---|---|
| Minor hardware issue | Repair |
| Cushion replacement | Repair |
| Single spring failure | Repair |
| Extensive frame damage | Evaluate replacement |
| Multiple major failures | Consider replacement |
| Very old recliner | Compare costs carefully |
When Should You Replace Instead of Repair?
I love saving furniture.
But occasionally, replacement makes more sense.
The key is recognizing when you’ve reached that point.
Severe Structural Damage
Major frame issues often become expensive.
Examples include:
- Broken welds
- Cracked load-bearing supports
- Extensive warping
At some point, repair costs may exceed the value of the chair.
Multiple Simultaneous Failures
Imagine a recliner that has:
- Broken springs
- Worn cushions
- Damaged mechanism
- Bent frame
Each issue alone may be repairable.
Together, they can become expensive.
Age of the Recliner
Older recliners may present additional challenges.
Such as:
- Obsolete parts
- Reduced structural integrity
- Ongoing maintenance needs
Age alone isn’t a reason to replace a chair.
But it should factor into the decision.
Comfort and Safety Concerns
If the recliner no longer feels:
- Stable
- Comfortable
- Safe
replacement may provide better long-term value.
Tips to Prevent Your Recliner From Leaning Again
Prevention is always cheaper than repair.
Thankfully, most preventative maintenance takes only a few minutes.
Tighten Hardware Periodically
Check bolts and screws every few months.
This simple habit prevents many problems.
Rotate Seating Positions
Most people have a favorite spot.
And recliners know it.
Try occasionally varying your seating position to reduce uneven wear.
Avoid Excessive Weight Stress
Every chair has weight limits.
Consistently exceeding them increases wear on:
- Springs
- Frames
- Mechanisms
Follow manufacturer guidelines whenever possible.
Lift Instead of Dragging
Dragging a recliner can stress:
- Legs
- Bases
- Frame joints
When moving the chair:
Lift carefully.
Or get help.
Keep Mechanisms Clean
Dust and debris can affect moving parts.
Periodically inspect and clean:
- Tracks
- Linkages
- Pivot points
Lubricate Moving Components
A properly maintained mechanism experiences less wear.
Use appropriate lubricants when recommended.
The Secret to Recliner Longevity
After working on countless recliners over the years, I’ve noticed something interesting.
The chairs that last the longest aren’t necessarily the most expensive.
They’re the ones that receive occasional maintenance.
A few minutes every few months can add years to a recliner’s useful life.
It’s not glamorous.
But it works.
Common Repair Mistakes, Troubleshooting Guide, FAQs, and Final Thoughts
You’ve made it to the final part of this guide.
By now, you know how to:
- Diagnose a leaning recliner
- Inspect the frame and base
- Check springs and cushions
- Troubleshoot reclining mechanisms
- Evaluate repair costs
- Decide whether repair or replacement makes more sense
Now let’s cover the mistakes that can turn a simple repair into a frustrating project—and then wrap everything up with a practical troubleshooting guide and FAQs.
Common Recliner Repair Mistakes to Avoid
I’ve seen some creative recliner repairs over the years.
And by “creative,” I mean repairs that somehow made the chair worse.
Fortunately, most mistakes are easy to avoid.
Ignoring Early Warning Signs
Many recliners don’t suddenly lean overnight.
They usually provide warnings first.
Examples include:
- Small wobbling
- Occasional creaking
- Slight unevenness
- Minor sinking
The earlier you address these symptoms, the easier repairs tend to be.
Why This Matters
A loose bolt today can become a damaged frame tomorrow.
Small problems often grow into larger ones.
Overtightening Hardware
This surprises many homeowners.
Yes, bolts should be tight.
No, they shouldn’t be tightened with the force of a superhero trying to stop an asteroid.
Overtightening can:
- Strip threads
- Damage brackets
- Crack wooden components
Firm and secure is the goal.
Replacing Parts Before Diagnosing the Problem
This is probably the most expensive mistake.
I’ve watched people replace:
- Cushions
- Springs
- Reclining mechanisms
only to discover the real problem was a loose mounting bracket.
Always diagnose first.
Buy parts second.
Using Incorrect Replacement Parts
Not all recliner components are universal.
Using the wrong:
- Spring
- Bracket
- Fastener
- Mechanism component
can create new problems.
Whenever possible:
- Match part numbers
- Follow manufacturer recommendations
Skipping Safety Precautions
Never forget:
- Springs can snap.
- Recliners can be heavy.
- Power recliners contain electrical components.
Protect yourself first.
Repair the chair second.
Quick Troubleshooting Guide
If you’re looking for a fast diagnosis, this section can save time.
Recliner Leans Only When Someone Sits Down
Most Likely Causes
- Weak spring
- Compressed cushion
- Frame support issue
Recommended Action
Inspect support systems and seating foam.
Recliner Rocks Side to Side
Most Likely Causes
- Uneven floor
- Damaged foot
- Loose base hardware
Recommended Action
Check flooring and inspect the base.
Recliner Tilts More When Reclined
Most Likely Causes
- Reclining mechanism wear
- Loose linkage components
- Bent mechanism arms
Recommended Action
Inspect moving parts carefully.
Recliner Suddenly Started Leaning
Most Likely Causes
- Loose hardware
- Broken spring
- Failed bracket
Recommended Action
Perform a full visual inspection.
Recliner Feels Uneven but Looks Fine
Most Likely Causes
- Cushion compression
- Hidden spring damage
- Flooring issue
Recommended Action
Compare support levels and test on another surface.
Recliner Problem and Solution Reference Table
| Symptom | Possible Cause | Recommended Fix |
|---|---|---|
| Leaning to one side | Loose hardware | Tighten or replace fasteners |
| One side lower than the other | Worn cushion | Replace foam or cushion support |
| Chair rocks | Uneven floor | Use shims or level flooring |
| Leaning while reclined | Mechanism issue | Inspect linkage and pivots |
| Sinking sensation | Weak spring | Replace damaged spring |
| Visible frame distortion | Bent frame | Repair or replace frame |
| Uneven movement | Power mechanism issue | Inspect motor and actuator |
Frequently Asked Questions
The most common causes include:
Loose bolts
Damaged springs
Worn cushions
Bent frames
Uneven flooring
A careful inspection usually identifies the problem
Yes, many frame issues can be repaired.
Minor damage may require:
Reinforcement
Hardware replacement
Bracket installation
Severe structural damage may require professional repair or replacement.
Often, yes.
If the repair cost is reasonable and the chair remains comfortable, fixing it may be more economical than buying a new recliner.
However, multiple major failures may make replacement the better choice.
DIY repairs may cost as little as:
$5–$50
Professional repairs can range from:
$75–$500+
depending on the issue.
Absolutely.
Uneven flooring is one of the most overlooked causes of recliner leaning.
Always test the recliner on a known level surface.
With proper maintenance, many mechanisms last:
10–15 years
Sometimes longer
Usage frequency and build quality play major roles.
Many minor issues can be handled by homeowners.
However, electrical repairs involving:
Motors
Wiring
Control systems
may require professional assistance.
A good rule is every:
6–12 months
Routine inspections help prevent larger issues later.
Summary
A recliner that leans to one side may look like a major problem.
Fortunately, it often isn’t.
In many cases, the solution is surprisingly simple.
Start With the Basics
Check:
- Bolts
- Screws
- Brackets
- Feet
These are among the most common culprits.
Inspect the Support System
Evaluate:
- Springs
- Cushions
- Mechanisms
These components affect balance and comfort.
Don’t Forget the Floor
Sometimes the recliner is innocent.
And the floor is guilty.
Repair Before Replacing
Many leaning recliners can be fixed quickly and affordably.
Always investigate before shopping for a replacement.
Practice Preventive Maintenance
A few minutes of inspection every few months can prevent years of frustration.
Final Thoughts
A good recliner isn’t just furniture.
It’s often:
- Your favorite reading spot
- The best seat for movie night
- The place where naps mysteriously happen
So when it starts leaning to one side, it’s understandable to worry.
The encouraging news is that most leaning recliners are repairable.
Whether the issue involves:
- Loose hardware
- Springs
- Cushions
- Mechanisms
- Flooring
there’s usually a practical solution.
Take your time.
Inspect carefully.
Start with the simple possibilities.
You may be surprised by how quickly your recliner returns to its comfortable, balanced self.
And if all else fails, at least you’ll know you gave the old chair a fighting chance before replacing it.
Disclaimer
This article is intended for informational and educational purposes only. Recliner designs vary by manufacturer and model. Always follow the manufacturer’s instructions and safety recommendations when performing repairs. If structural damage, electrical issues, or safety concerns are present, consult a qualified furniture repair professional.